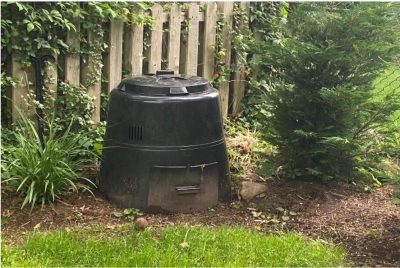
Round or square, commercially available plastic bins offer a convenient and relatively inexpensive system for backyard composting. Often municipalities make these types of bins available at a discount to residents interested in recycling food and yard waste on their properties. Compost is created when soil microbes break down or decompose organic materials to create a nutrient rich soil amendment. To successfully make compost using one of these bins, the amount of various organic materials, air and water is managed for optimum microbial activity. Design constraints of these bins limit the creation of ‘hot’ compost piles, but a valuable soil amendment still results.
Pay special attention to the proper ratio of 'brown” to “green’ ingredients. ‘Brown’ materials provide a source of carbon and ‘green’ materials a source of nitrogen to the microbes. Whenever a load of 'greens’, such as food scraps, plant debris, or herbicide-free, fresh grass clippings are placed into the bin, add about 2 or 3 times the volume of 'browns’, such as shredded or torn (non-glossy) newsprint or cardboard, dried leaves, sawdust or even purchased wood shavings, like the kind used for small animal bedding. By doing this, a gooey mess of food scraps will be avoided, critters are less likely to be attracted, and a well-balanced compost product will be produced in less time. Compost is excellent for conditioning the soil in vegetable gardens, ornamental beds, lawns, or potted plants.
Here are some other helpful hints to successfully make compost with your bin:
- Round or square plastic bins are most suited for composting food wastes rather than yard wastes because of their small size. Use of small amounts of yard waste is recommended but a second bin or separate pile may be required if large amounts of yard waste are to be composted.
- Locate the bin on level ground in a well-drained area that is convenient to access year-round.
- It is important to turn the compost mixture to aerate it. Once a month is usually sufficient with plastic compost bins. Since there may be limited space to turn the mixture in the bin with a pitchfork or shovel, use a “winged compost aerator” that can be bought either online, at a local hardware or big box store.
- Use the “lasagna” method of adding ingredients by layering the brown and green materials, starting with the ratios mentioned above. Adding a few sticks or larger wood chips to the bottom and then occasionally as you layer will also help provide some aeration to speed up the process.
- For fastest decomposition (6 to 12 months), all materials should be in pieces no bigger than 3 or 4 inches in size.
- If using leaves, chop or shred them before putting them into the bin, if possible. This will help speed up the decomposition process.
- Occasionally add water to keep the mixture moist. The mixture should be about the same moistness as a wrung-out sponge.
- When the bin is full, continue to turn monthly until most of the materials added to the pile are no longer recognizable. Typically, the volume will be reduced by about half. Finished compost should be brown and crumbly with a pleasant earthy odor.
- To empty the bin, make a space next to it, lift the bin up and off the pile and move it to the empty space.
- Now empty, another pile can be started in the bin. The finished pile, now exposed, will sit in a nice column until ready for use. Screen out the sticks and other ingredients that did not decompose and add them back in to the bin.
- If just a small amount of compost is needed, plastic composters typically have a small door at the bottom where one can remove a shovelful of compost at a time.
- Finished compost can be incorporated into garden beds or used to topdress ornamental plantings or lawn.
- Keep in mind that compost can change the pH and nutrients levels of the soil so consider testing the soil a few weeks after compost is added.
- Have all your tools and components close at hand, such as a food scrap bucket, a pile of leaves or other brown ingredients like the bedding material, a watering can, and a winged aerator or other tool to turn the compost mixture.
- Food scraps can continue to be added all winter and covered with a handful of leaves or shredded paper. A thicker top layer of leaves or wood shavings serves as a blanket over the pile during the colder winter months.
Learn as you go, find out what works best for you, and have fun experimenting. There is no perfect way of making compost, so don’t give up! You will be doing our earth, your community, and your gardens a favor by helping to do what nature intended.
By Dan Martens, Marc Warren, & Denise Arturi, UConn Master Composters and Dawn Pettinelli, Associate Extension Educator, PSLA. 2022.
UConn is an equal opportunity program provider and employer.
©UConn Extension. All rights reserved.