Looking for a low-tech way to recycle kitchen scraps while at the same time creating a great soil amendment, right in your own home? If so, vermicomposting, or in layman’s terms, composting with worms might be just the solution you are looking for. The basic premise of vermicomposting is that worms live in a container of moistened, shredded paper bedding into which food wastes are placed. The worms consume both the bedding and the kitchen scraps, and produce nutrient-rich castings that are added to gardens or planting mixes. A well-maintained worm bin should not smell and can recycle at least one pound of food waste for every pound of worms per week.
Making A Worm Bin
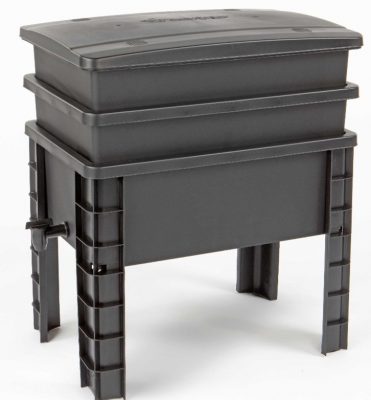
There are several ready-made worm bins on the market. Some consist of stacking trays with a liquid collection pan at the bottom while others are more simple plastic or wooden units. Most beginning worm farmers make their own bin out of a 5 to 10 gallon dark-colored, plastic storage bin with a lid. Do not purchase clear or translucent plastic bins as worms need a dark environment. As a general rule of thumb, each ¼ lbs. of worms requires about one square foot of space so the size of the container depends on how many worms will be acquired.
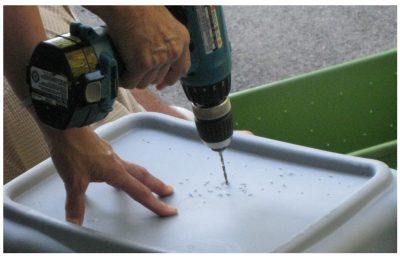
Drill
1/8 to ¼ holes in the top, sides and bottom for oxygen to enter and for any liquid to drain. The number of holes varies although there are usually at least 2 rows of holes going around the sides and at least a dozen on the bottom and top. This smaller bin can be set inside a larger bin, other plastic container or foil roasting pan. The reason for this second container is to collect any excess liquid which might seep out if a lot of watery fruits and vegetables are feed to the worms and not enough absorbent bedding is added.
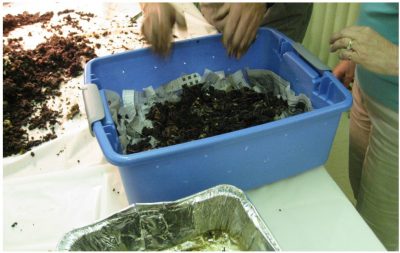
Newspaper is usually the bedding material of choice because of its widespread availability. Other bedding materials include shredded non-glossy office paper, non-corrugated cardboard (corrugated cardboard contains glues) or coconut coir that is sold in brick or pellet form and expands with water. Shred the newspaper or paper and soak in a bucket of water. Wring the paper out and place it in the worm bin fluffing it up somewhat and filling the bin 1/3 to ½ full of bedding. If mixing coconut coir in, soak that material first as well.


Worms do not have teeth. They digest their food in their gizzards and need grit to do this. Place a handful or two of very fine sand or soil into the bin and mix it into the moistened bedding. Because garden soil can harbor eggs of sowbugs, slugs, and undesirable (for composting) earthworm species, microwave each handful of soil for 90 seconds on high. Loosely cover the soil with plastic wrap or a paper towel before microwaving.
Which Worms To Use
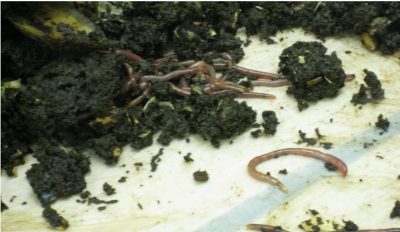
Now for the worms! Red wigglers are great for indoor worm bins. Friends with worm bins are often happy to share extra worms. Sometimes worms need to be purchased. If this is the case, worms should be ordered by their Latin, not common name. The species of worms that are the best for vermicomposting and less likely to cause damage to native ecosystems in New England, if any escape, are Eisenia foetida. Prices for Eisenia foetida range from $35 to $50 per pound. One-half to one pound of worms should be enough to start a bin. There are about 1000 red wigglers in a pound and they can consume from 1 to 2 pounds of food wastes per week. Once the initial cost is incurred, it is doubtful that more worms will need to be purchased and they will supply you with an infinite amount of nutrient-rich castings. All you have to do is properly manage them.

Care and Feeding of Composting Worms
So what do composting earthworms require? They need a dark, moist environment, food, comfortable temperatures of between 50 and 80 degrees F, and they need to breathe. Earthworms do not have lungs. They breathe through their skin and can only do this when their skin is moist. Bins should always be as moist as a wrung out sponge if not a bit wetter. Keep a spray bottle filled with water next to the bin so moisture can be added whenever necessary. Also composting worms do not tunnel like garden worms; rather they live communally under the bedding.
Worms like soft, mushy food since they cannot chew. Cut fruits and vegetables into smaller pieces before placing a handful or so in a few spots around the bin. Fresh items will take a few days to be colonized by microbes which start to break down the food and soften it. Place food items down into the bedding and cover them up to discourage fruit flies. Usually worms are fed about once a week. Check to see that the previous week’s food is being consumed before adding more. Uneaten food may signal overfeeding or a dislike for a particular food item. If a particular food item has been left untouched for a couple of weeks, remove it and refrain from adding it to the worm bin again.
Food items that are readily accepted by composting worms include vegetable and fruit cores, peels and leftovers, tea bags and coffee grounds, egg shells, leftover cooked grains like rice and quinoa without added butter or oils. Avoid adding citrus fruits to the worm bin as the worms generally do not find them palatable. Occasionally add a handful of high cellulose material like sawdust, torn up un-corrugated cardboard or fall leaves. Never add meat or dairy products, fish, paper with bright inks, pet feces or fish.
Harvesting and Using Castings
Worm castings can be harvested once or twice a year depending on the bin size and number of worms. An easy way to harvest the castings is to just dump the whole bin onto a plastic table cloth, clean the bin and fill it with fresh bedding material and a handful or two of microwaved soil. Sort through your pile of castings and worms and place any worms back in the bin. Some worm farmers move everything in the bin to one side, and add fresh bedding and food to the other side and worms should move over to the new feeding area within a month or two. Then the castings can be removed with any remaining worms put back in the bin.
The harvested worm castings can be directly added to garden beds, used as a component in a potting mix or enlisted to make a compost tea. For the most part, the casual worm farmer is only able to harvest enough castings to cover part of the vegetable garden ¼ inch deep. With each harvest, another part of the garden can be amended.
The two most popular reasons for adding vermicompost to the garden are for added nutrients and added pest protection. As previously mentioned, vermicompost is rich in many plant nutrients. What has been more recently noted and studied is that additions of vermicompost in garden beds may deter and/or reduce the amount of feeding by certain insects.
The bottom line is that worm composting is an easy way to reduce food wastes which otherwise would be headed to the incinerator or landfill while at the same time providing a valuable soil amendment.
By Dawn Pettinelli, Associate Extension Educator, PSLA. Written 2014, updated 2023.
Questions? Contact:
UConn Soil Nutrient Analysis Laboratory
Department of Plant Science and Landscape Architecture
Phone: 860.486.4274
Email: soiltest@uconn.edu
Website: soiltesting.cahnr.uconn.edu
UConn is an equal opportunity program provider and employer.
©UConn Extension. All rights reserved.
